It's Big Awesome Savings time
75% OFF FOR 6 MONTHS*
Need help choosing a plan?
Created with Sketch. 1800 917 771 Schedule a call
Need help?
We're here for you.
Schedule call
Created with Sketch.
Image Alt Text
product update

QuickBooks Online: inventory recent updates

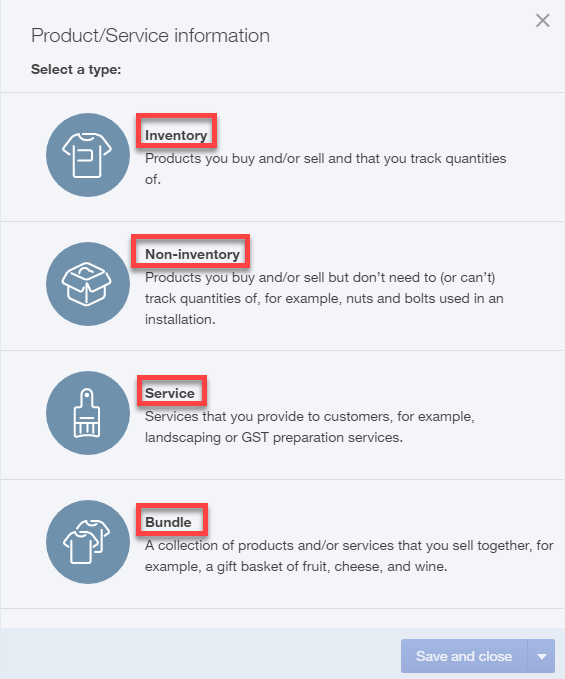
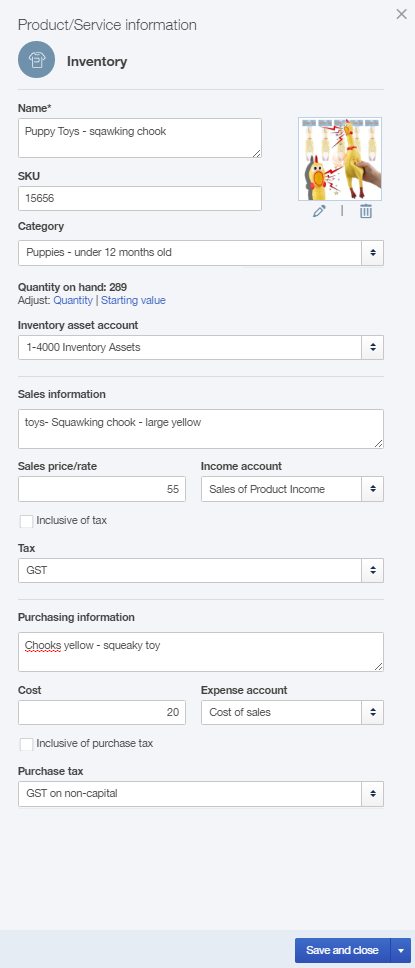
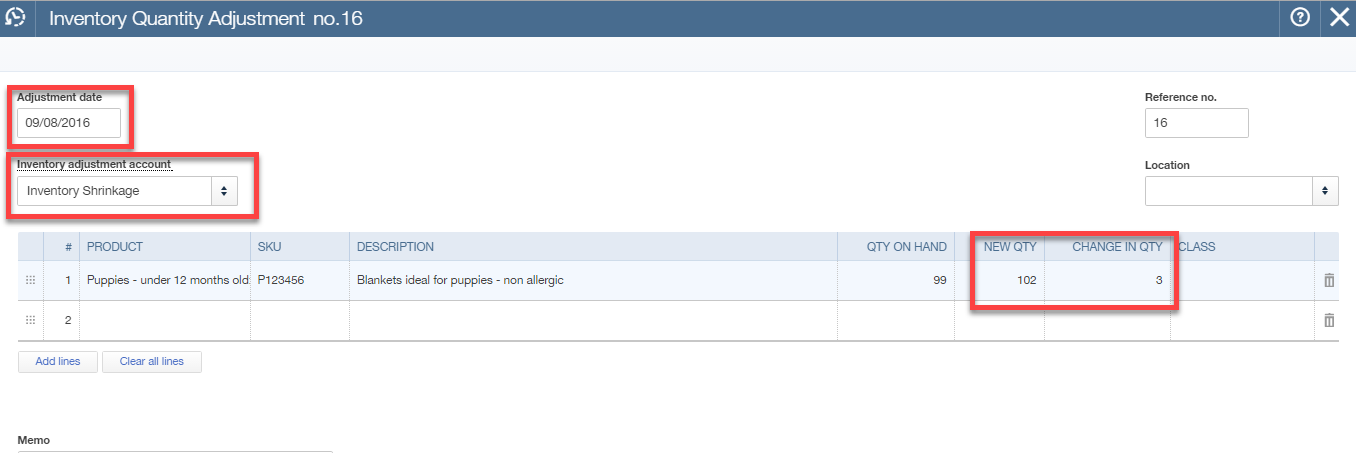
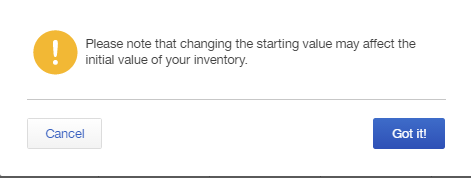
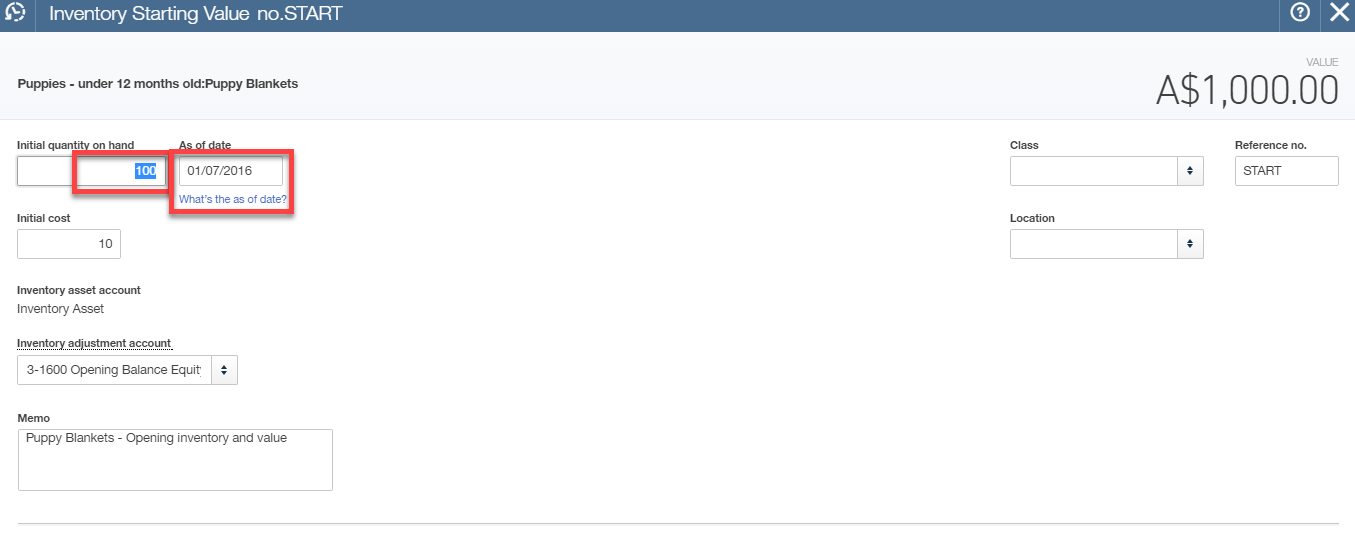
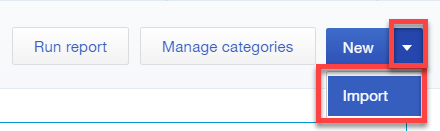
Inventory has seen some great improvements over recent months. We look at some shortcuts and various ways of processing transactions in Inventory, such as adding inventory, adjusting opening balances, adjusting quantities, importing and exporting out of QuickBooks Online and more.

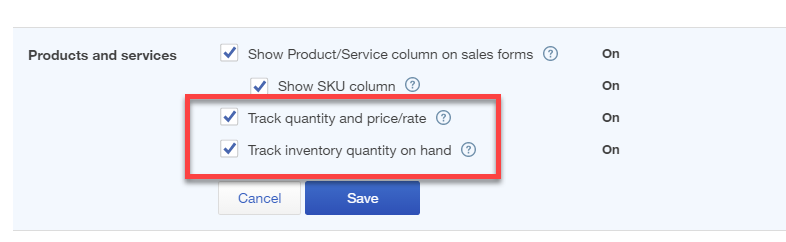
Note: Inventory and inventory tracking are available only in the QuickBooks Online Plus version.

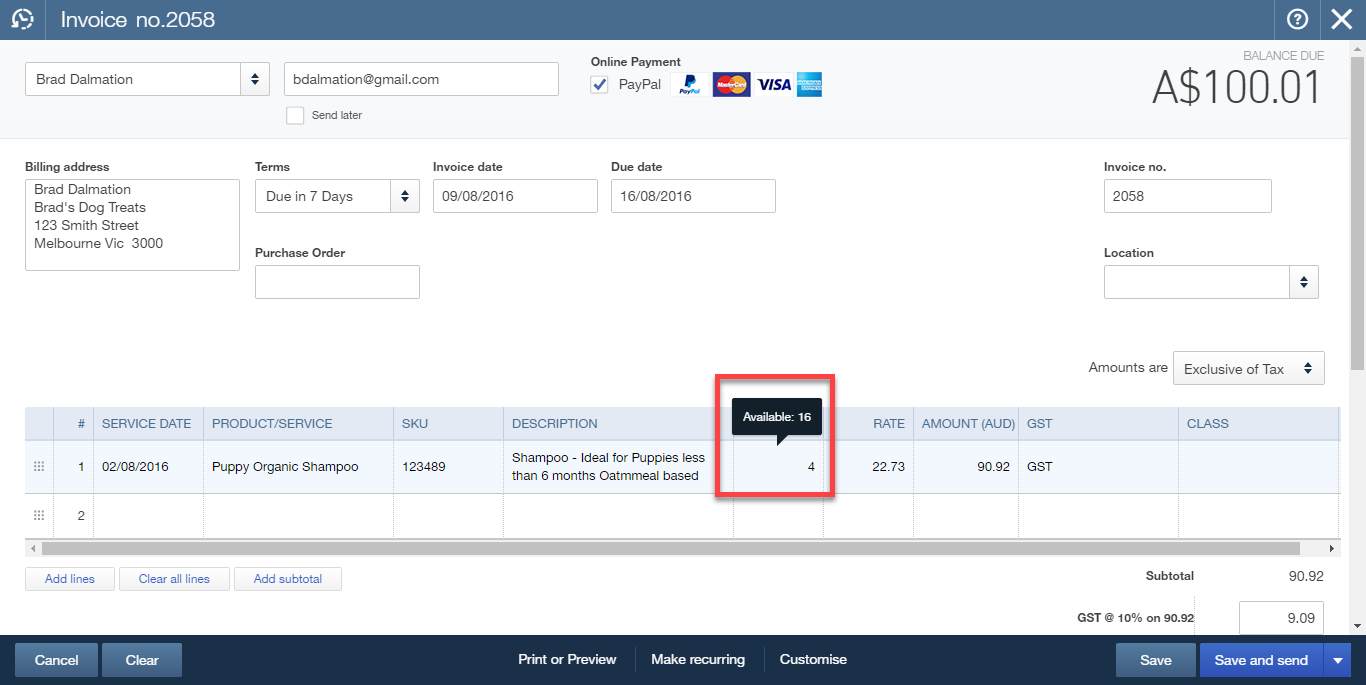
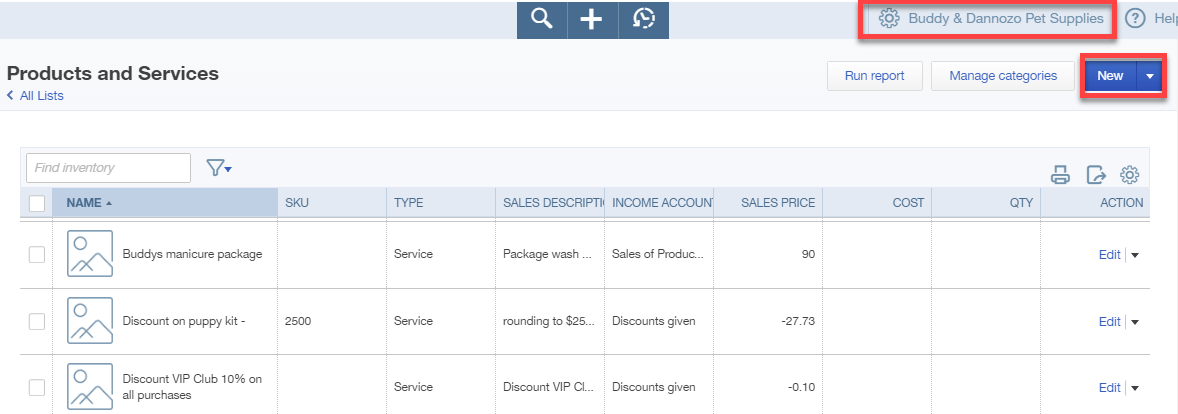
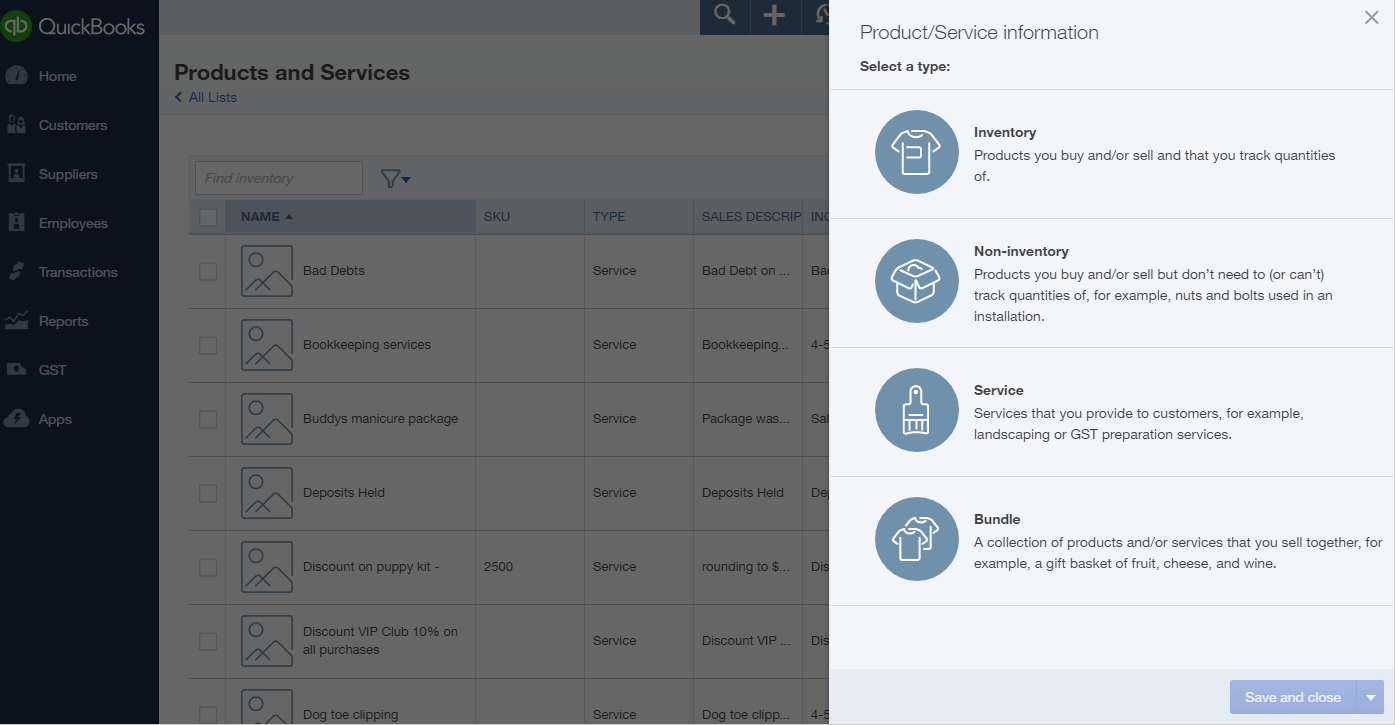
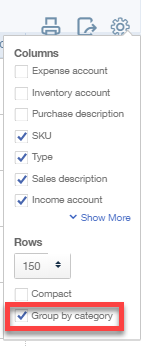
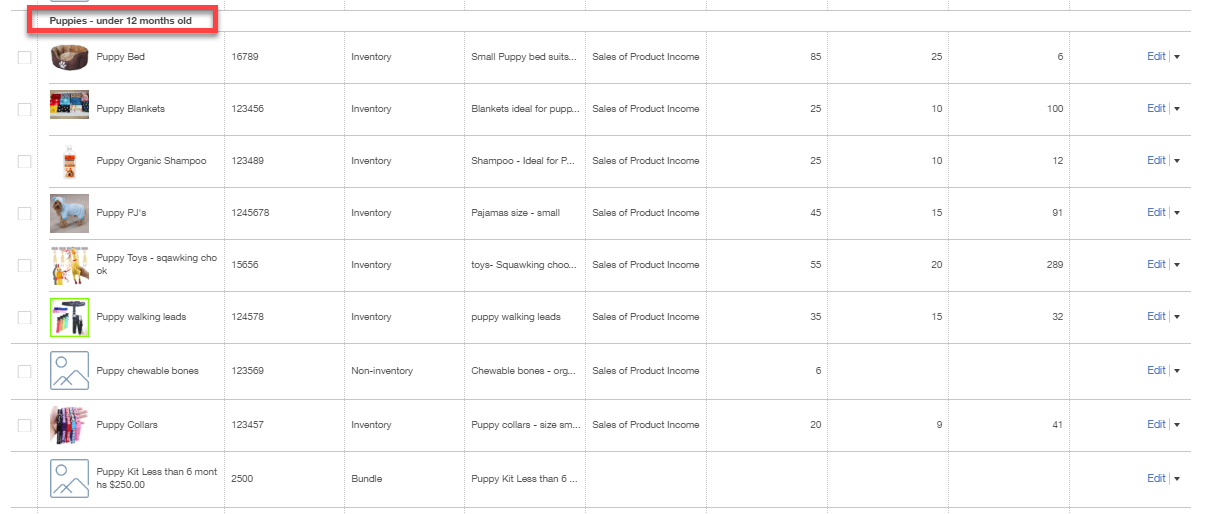
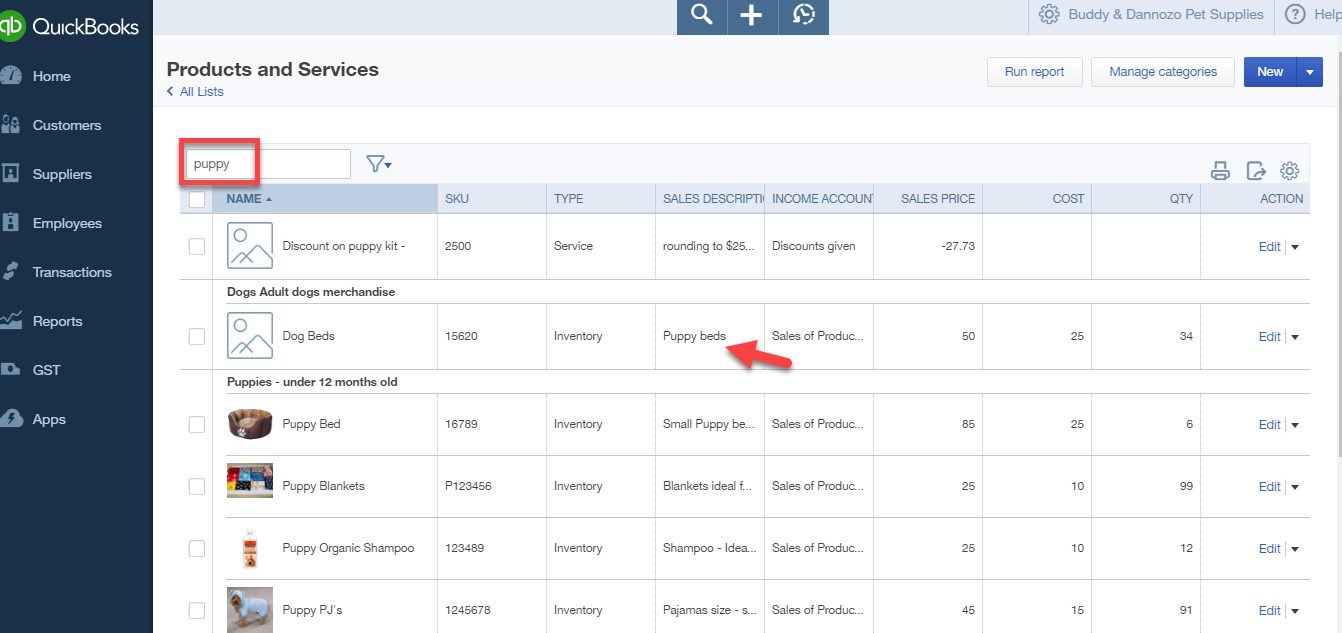
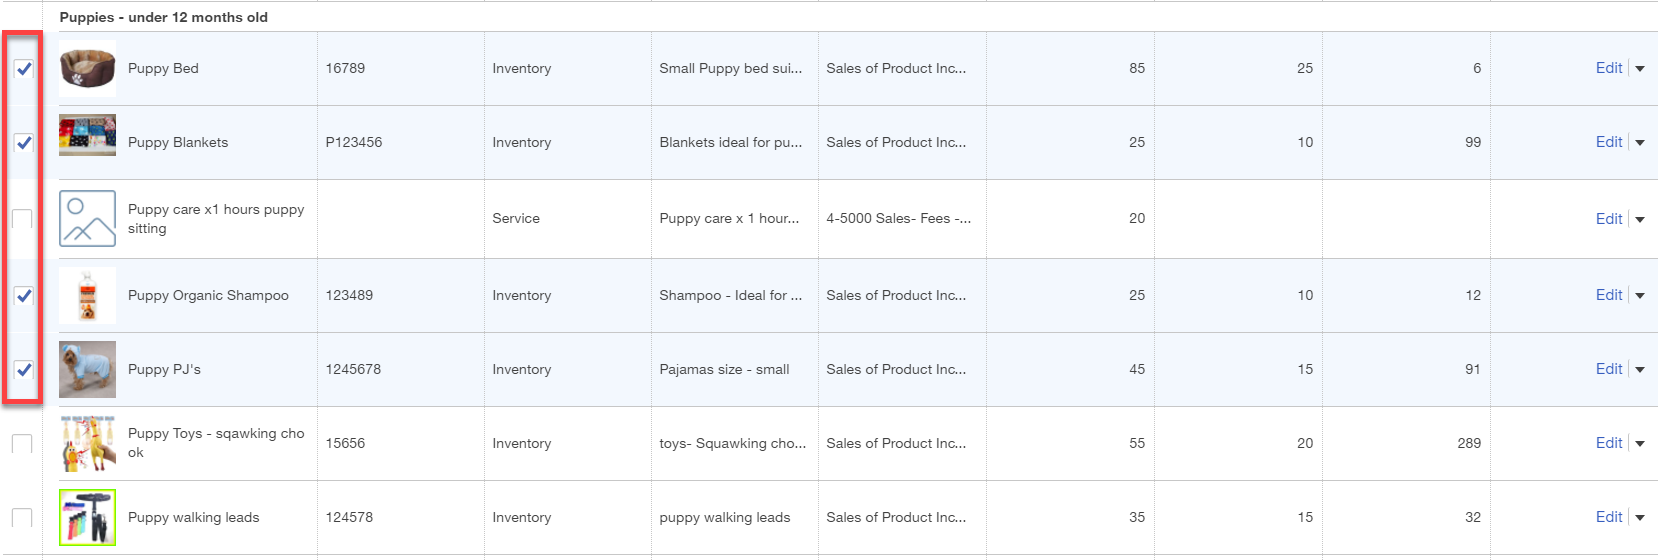
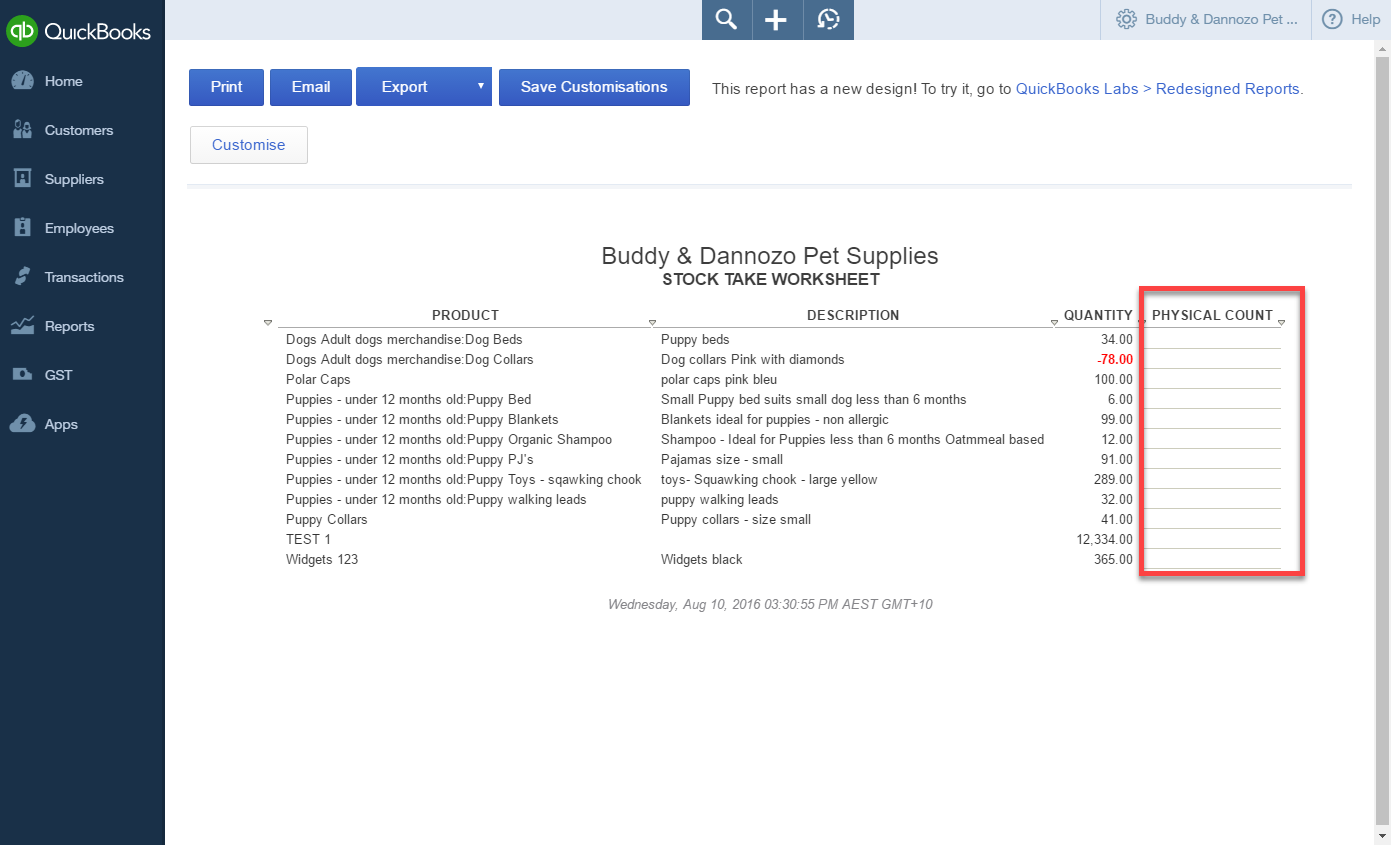
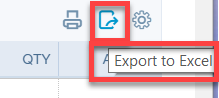
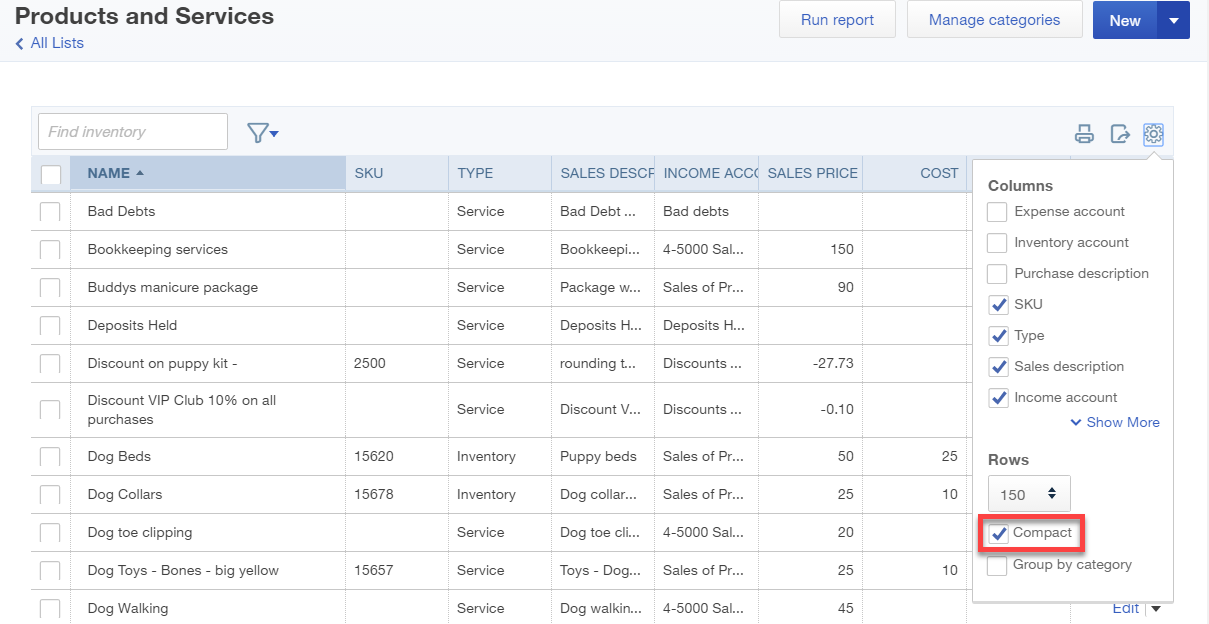
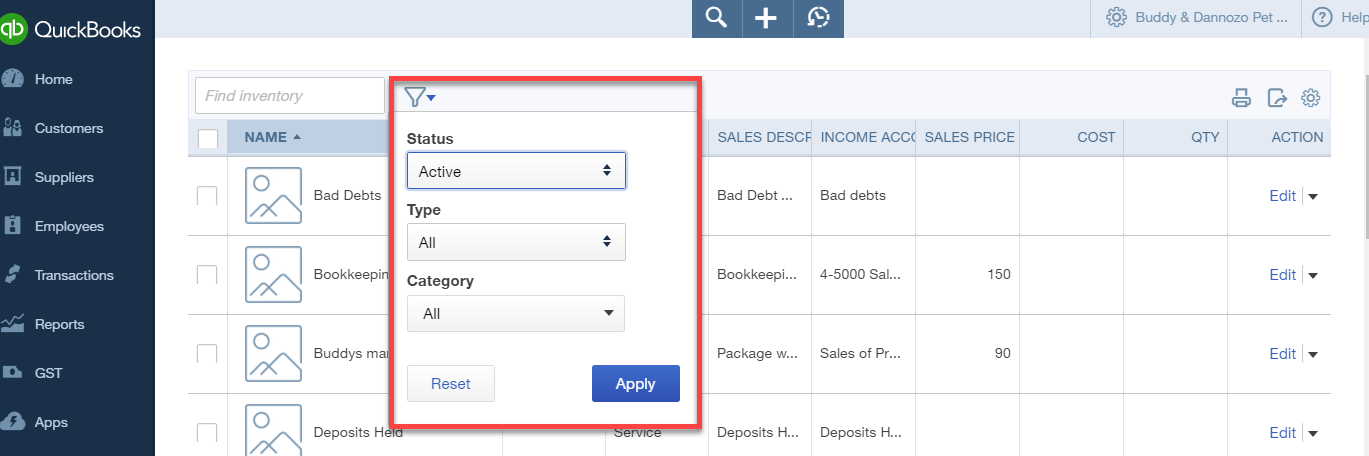
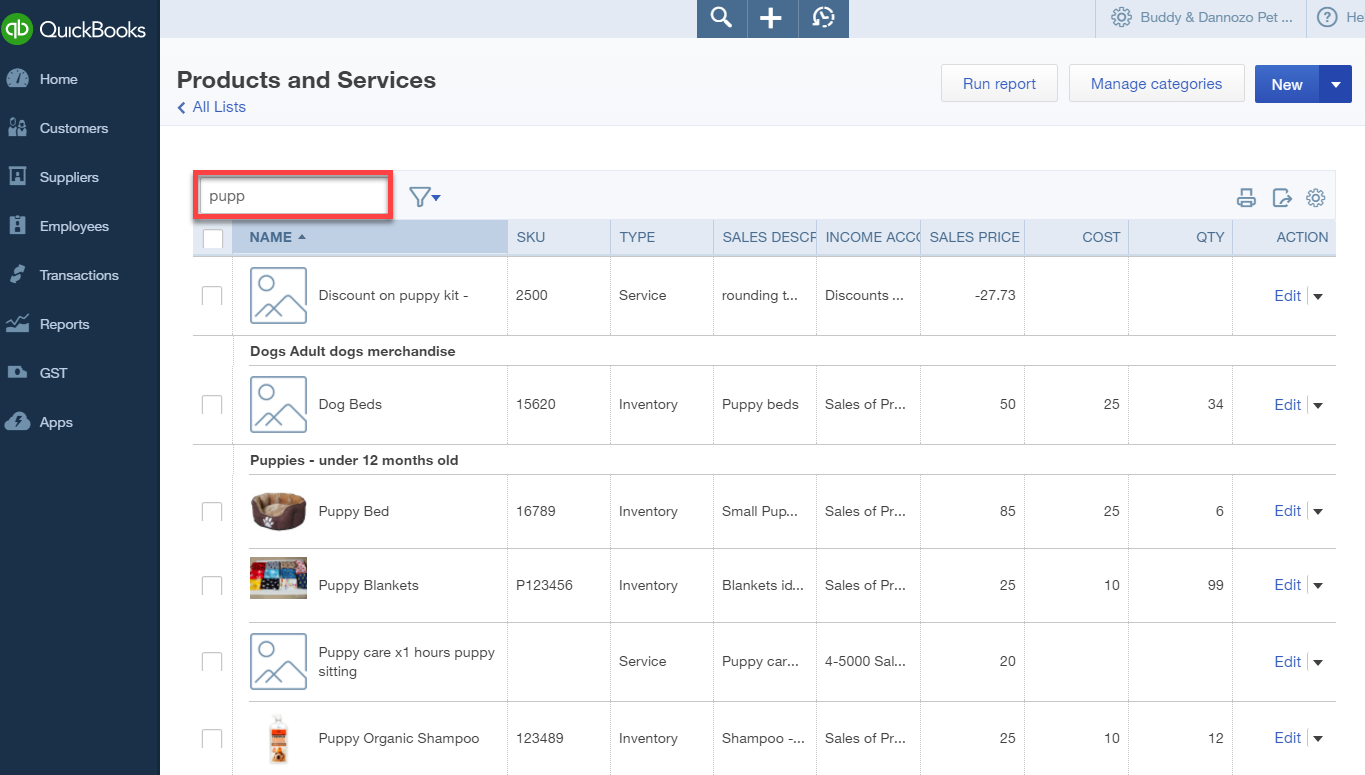
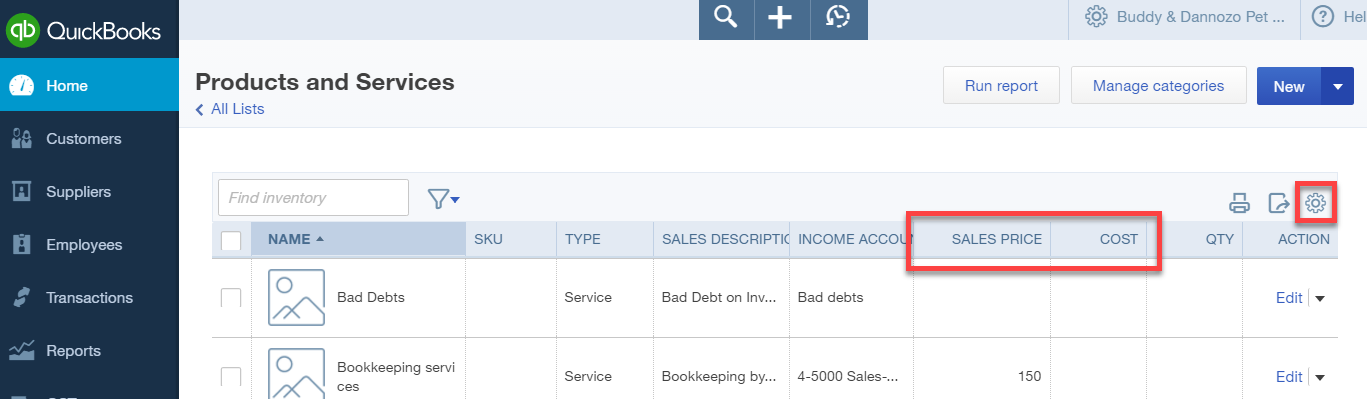
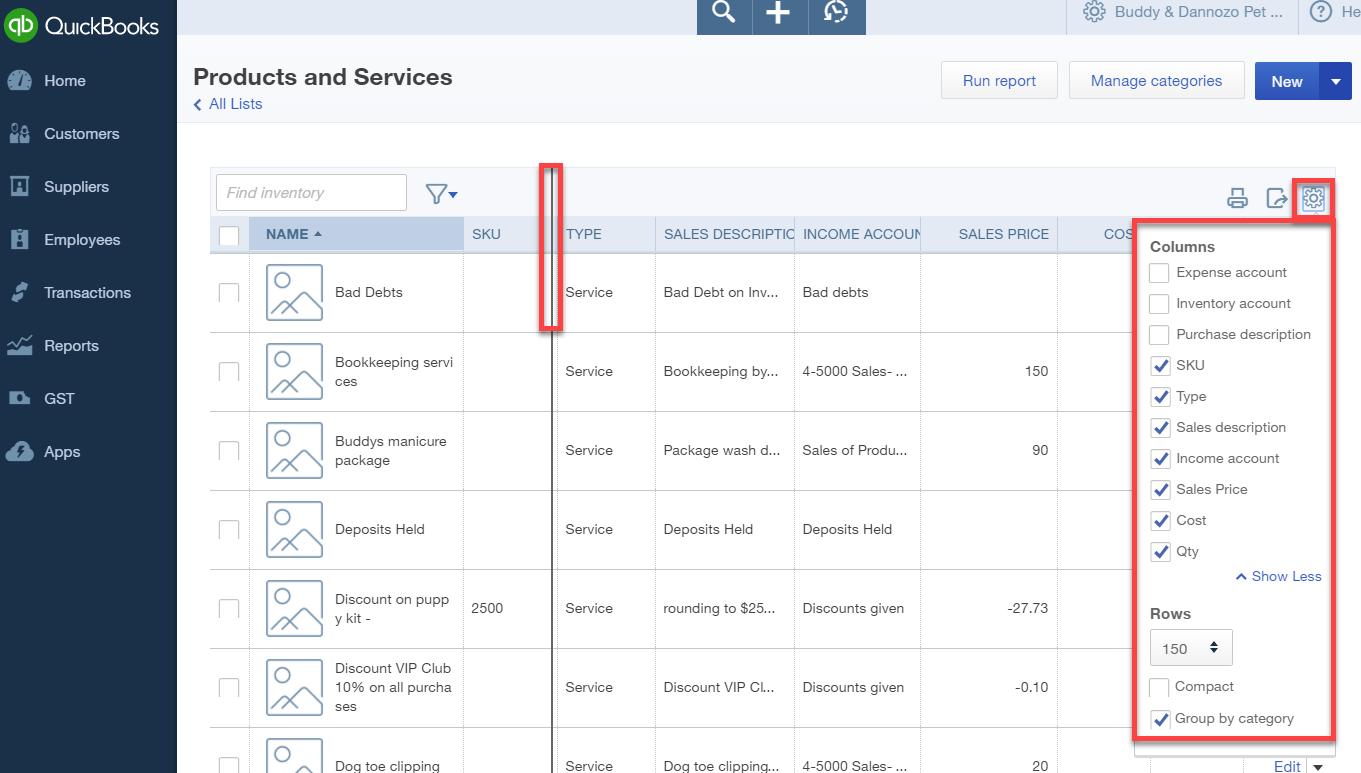
QuickBooks Online helps you manage inventory in one place so your books are always up to date. No more manually entering inventory numbers into a spreadsheet. Stock control has become easier as you are able to print a stock take sheet and count on the run, on your tablet or laptop.


Turn on inventory tracking

First up, let’s make sure Inventory is turned on.

Click the company gear icon (top right corner) > Settings > Company Settings > Sales > Products and Services > select Track inventory quantity on hand and click Save.


Easily see quantity available as you enter the sales form: QuickBooks Online shows you exactly how much stock you have on hand as you fill out sales forms. Now you can see straight away if you have enough stock or if you need to purchase more.

Easily see the quantity available as you enter sales invoices, as seen in the example below. Create your invoice from the (+) Create button, enter in the product that has been sold and hover over QTY column.


Create your product list: Getting started in QuickBooks Online with Inventory is quite easy. One of the first things needed is to add your inventory items. Click the Gear icon > Lists > Products and Services > New.

New item drawer: Clicking ‘New’ displays a right-hand-side drawer that lets you create a new product or service. Enter an item type, upload a photo and provide additional details.

Four item types to choose from:

  • Inventory item: Products you sell and buy, and track quantities.
  • Non-inventory item: Products you sell and buy, but you do not need to track quantity.
  • Service: Service you provide to customers.
  • Bundle: Collection of products and services that you sell together to produce a package.


Adding an inventory item

Ensure you set up your inventory item correctly: All fields to be completed are shown below. Note the correct Income account and Expense/Cost of Sale accounts are chosen. If not, your financials may not be correct. Make sure to check the SKU number, initial quantity on hand and date, sales and cost price – GST inclusive or exclusive prices. Inventory Asset account is automatically set up – the method of inventory is FIFO.

Adding an image to inventory:

By adding an image to the inventory item, it makes it much easier to choose the correct item. All that’s required at set-up of an inventory item is for you to click the image field and choose an image to match the inventory item. As shown below, it’s easier to distinguish items this way.


Reclassify items: If required, you may need to change the type of an item – for example, a non-inventory to an inventory item. Locate the item required in the Products and Services list, click Edit, and at the top of drawer click Change type.

To change the item type on many items, you can now batch-edit them (between service items and non-inventory items only).

Gear > Lists > Products and Services > select the box on multiple items from left-hand side > Batch actions > then choose Make non-inventory (or if chosen non-inventory items, change to Make service).

Here’s a summary of the item type changes supported:

Group items by categories

QuickBooks Online categories let you better organise, find, filter and enter products and services.

By categorising the products and services you sell to customers, you can better understand sales volume and who’s buying what. (Hint: Adding images can help you find the product easier.)

Set up categories: Click Gear > Lists > Products and Services > Manage Categories to set up and edit categories.

Apply a category to an item: Click Gear > Lists > Products and Services > New or Edit > Category > choose sub-category required.


Edit or delete categories: Click Gear > Lists > All Lists > Product Categories.

Then choose category > click on Edit or Remove.


View products and services with categories: You can view the Products and Services list in hierarchical or flat format, depending on which works best for you.

Click the gear icon > Lists > Products and Services > Gear settings > Group by category.


The categories will then be grouped by category. For example, ‘Puppies – under 12 months old’ category will show the products that have this category all in the one group.

Track items by SKU

Display SKU information: Easily track products and services by SKU.

To show the SKU on-screen on transaction forms:

Click on the Gear icon top-right corner > Company Settings > Sales > Products and Services > Show SKU column. The SKU column appears by default if you’re using SKUs, but you can always turn it off here.


Add inventory items by SKU: When you specify an SKU for an inventory item (Gear > Products and Services > Edit), you can then add the item to a sales form by searching on its SKU.

For example, if you specify the SKU P123456 for an item…

…you can then enter the SKU in the invoice’s Product/Service column to find it.

Notice the SKU appears below each item in the list.


Once the product has been chosen, the SKU will appear under the SKU column.

To print SKU details on the invoice, ensure you have correctly selected the SKU on the invoice template. Click on the Gear > Custom Form Styles > New style > Airy > Activity Table > SKU.

Note: This is only on the Airy template.


The SKU column on a printed invoice.

Select and find items by description

Select a product/service by its description: When you select a product/service on a form, the description can help you make the right choice. Create (+) > Invoice > Product/Service.


Search for an item by its description under Products and Services: Click on the Gear icon > Products and Services > Find inventory field.

If you search for all items with the description “puppy”, sales descriptions that include “puppy” will also be found.

Easily make inventory adjustments

QuickBooks Online makes it easy to change initial starting values for inventory items, as well as adjust inventory quantities to allow for inventory shrinkage due to theft, damage, counting errors, evaporations, etc.

Starting values are now editable: Previously, QuickBooks Online created a starting value transaction that couldn’t be edited when adding an inventory item. You can now edit this transaction.

This is particularly useful when you need to adjust the start date, initial cost, quantity or inventory adjustment account of an inventory item.

Click the Gear icon > Products and Services > find the inventory item you want to adjust > in the Action column click the drop-down arrow and select Adjust starting value or Adjust quantity. Make your changes as required.

Inventory quantity adjustment: These can be amended as required.

Enter in the new quantity in the NEW QTY column and QuickBooks Online will automatically calculate the CHANGE IN QTY and post to Inventory Shrinkage account. You can change the Inventory adjustment account if required and the date required for the change.

To adjust the starting value when chosen, a warning will pop up that the value may affect the initial value of inventory.


Go to Initial quantity on hand > the ‘As of date’> then ‘Initial cost’ to fix an error that was incorrectly posted at commencement of inventory.

Adjust the quantity of multiple items at a time via Batch actions: Click the Gear icon > Lists > Products and Services > select the items you want to adjust.


In the top-right corner, there’s a Batch actions button > choose Adjust quantity > make your changes in the NEW QTY column.


Adjust inventory from the Create (+) window: Create (+) > Inventory Qty Adjustment.

Track locations and classes: For more refined classification of your inventory items, linking a location and/or class with an inventory quantity adjustment or starting value adjustment can also be made at the same time.

Click on the Gear icon> Products and Services > Action column > Adjust quantity or Adjust starting value.

Add Location and or Class associated with the inventory adjustment while in the transaction.

Get insights with reports

QuickBooks Online reports help you manage inventory levels, see item sales performance and know what your inventory is worth.

Include SKU information on inventory reports: If you use SKU as your main item identifier, these reports will be especially useful.

Sales by Product/Service Detail: Click on Reports > All Reports > Review Sales > Sales by Product/Service Detail > Customise > Rows/Columns >

  1. Group by SKU, or
  2. Change Columns.


Purchases by Product/Service Detail: Click on Reports > All Reports > Review Expenses and Purchases > Purchases by Product/Service Detail > Customise > Rows/Columns > group by SKU or Change Columns.

Product/Service List: Click on Reports > All Reports > Manage Products and Inventory > Product/Service List > Customise > Rows/Columns > Change Columns.

Inventory Valuation Detail: Click on Reports > All Reports > Manage Products and Inventory > Inventory Valuation Detail > Customise > Rows/Columns > Change Columns.

Transaction Detail by Account: Click on Reports > All Reports > Accountant Reports > Transaction Detail by Account > Customise > Rows/Columns > Change Columns.

New report: stock take worksheet

Print out the report and take it to your warehouse to do a physical count of inventory, or have it handy on your iPad, save as an Excel spreadsheet and change as you count.

Enter the actual counts in the Physical Count column, then go to QuickBooks Online and enter inventory quantity adjustments to ensure the counts match up. Physical inventory accounts are typically done at the end of a period (yearly, half-yearly, quarterly).

Click on Reports > All Reports > Manage Products and Inventory > Stock Take Worksheet.

Other recent improvements

Importing/exporting items from Excel/CSV: To import: Gear > Products and Services > ▼ to the right of New > Import.

To export: Click on the Gear icon > Products and Services > Export to Excel icon (next to print and Gear settings icons).

View more of your Products and Services list: Click Compact on the Gear settings icon to see a compact view of all Products and Services.

Easily make a copy of an existing item: Locate the product > Edit > Click Duplicate.

Quickly make multiple items inactive: Click the checkboxes next to the product that is to be made inactive (or click the Select All checkbox at top next to Name) >Batch actions > from drop-down menu click Make inactive.


Filter items: This can be done at the funnel icon next to the Find Inventory field by:

  • Status: Active, Inactive, All.
  • Type: All, Inventory, Non-inventory, Service, Bundle.
  • Category: Categories set up within Products and Services.


Search for items in the Find Inventory Field by Name, SKU, Description or Category.

The Price/Rate column has been replaced by the Sales Price and Cost columns. The top row can be tailored by clicking on the gear settings icon and only columns chosen will be seen.

Columns can be customised by width by hovering over the top of the column line. This will show a line that can adjust the column width.

Column headings can be customised by clicking on the Gear settings icon and selecting the columns required.

With this new QuickBooks Online update, managing inventory is much easier.

To read more articles related to product updates, visit here.


Related Articles

Looking for something else?

Get QuickBooks

Smart features made for your business. We've got you covered.

Help Me Choose

Use our product selector to find the best accounting software for you.

QuickBooks Support

Get help with QuickBooks. Find articles, video tutorials, and more.

Stay up-to-date with the latest small business insights and trends!


Sign up for our quarterly newsletter and receive educational and interesting content straight to your inbox.

Want more? Visit our tools and templates!

By signing up you are agreeing to our terms and privacy policy.

A happy small business owner signing up for the QuickBooks newsletter on laptop